
The baseball cap is an essential! Learn how to sew a professional kids’ baseball cap with this easy-to-follow, beginner-friendly tutorial. This classic style is a staple in every child’s wardrobe and remains a must-have accessory for any sunny day.
This sewing procedure is straightforward, and we’ve made it even easier by providing a FREE professional sewing pattern for you to download. It’s the perfect project for anyone looking to create a practical and stylish handmade gift!
🔽 COMPLETE STEP-BY-STEP INSTRUCTIONS & FREE PATTERN 🔽
👍 If you enjoyed learning how to sew this children’s cap, please give this video a LIKE, and SUBSCRIBE to MyHow2 for more fun sewing, DIY, and craft tutorials! Tell us in the comments what fabric you chose for your baseball cap!

Materials:
-
Cap and inner sweatband: 100% cotton
-
Interfacing: Ronar Fix iron-on non-woven fabric (for reinforcing the visor)
-
Elastic: approx. 1 cm wide
How to Sew a Baseball Cap – Instructions:
We recommend watching the video, as text alone may not be immediately clear. You can download the pattern at the end of the article.
-
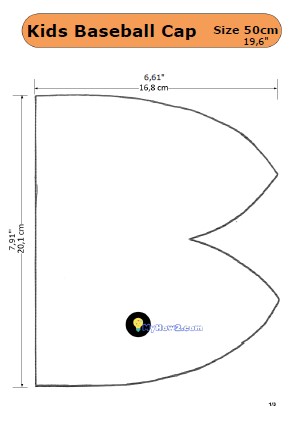
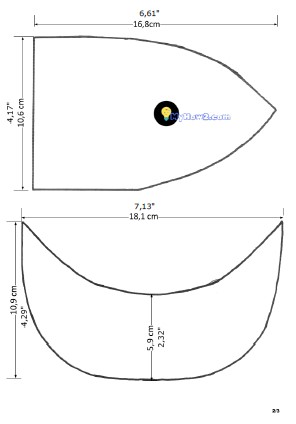
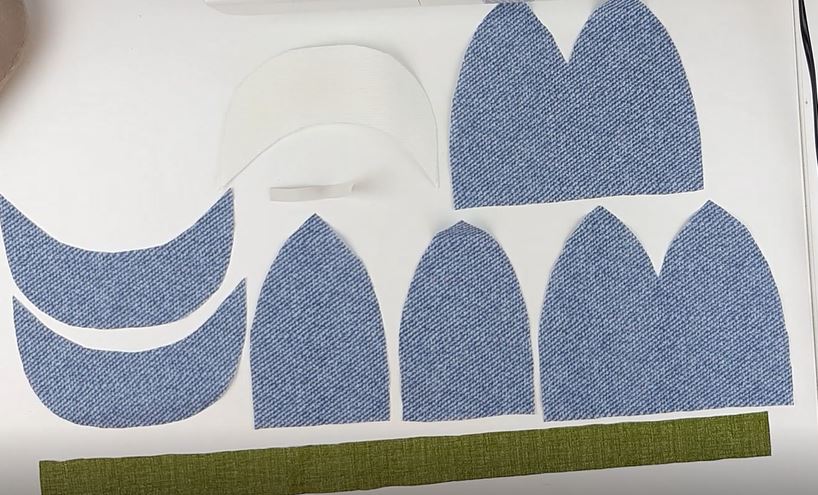
Print the pattern and cut out the individual pieces. Check that the dimensions of the printed pattern match the actual measurements.
-
Double-arc panel: Trace this onto your main fabric 2x and cut out.
-
Single-arc panel: Trace this onto your fabric 2x and cut out.
-
Visor (Brim): Trace onto the fabric 2x and cut out.
-
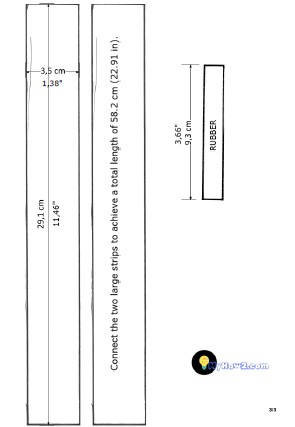
Visor Interfacing: Trace onto the Ronar Fix iron-on fabric 1x and cut out.
-
Inner Sweatband: Join the two strips from the pattern with tape so the total length is 58.2 cm. Trace this onto your sweatband fabric 1x and cut out.
-
Elastic: Cut a piece of elastic. Use a width of approx. 1 cm (other widths can be used as well).
-
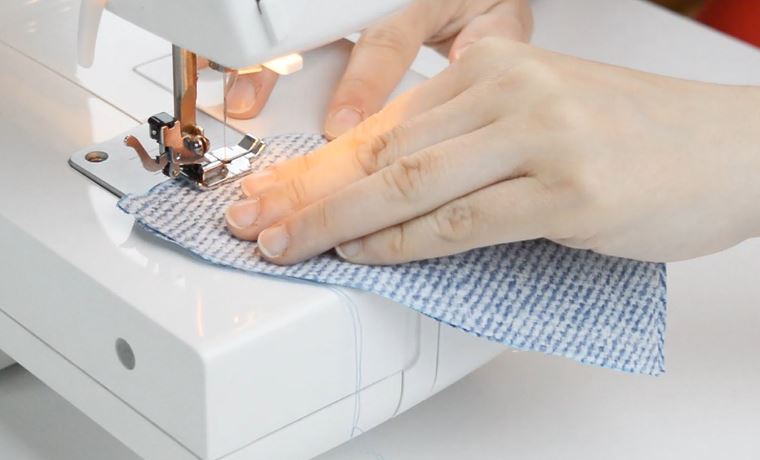
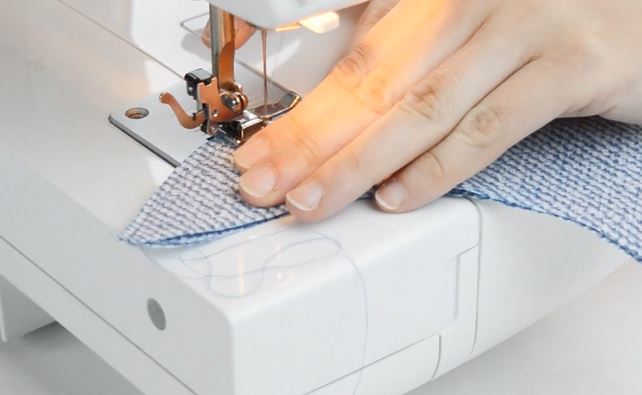
Take one double-arc panel, fold it in half with right sides together, and sew the shorter seam (the dart). A straight stitch was used in the video, but you can also use an overlock.
-
Flatten the seam to one side and topstitch it from the right side using a straight stitch so the fabric lies flat.
-
Repeat steps 8 and 9 for the second double-arc panel.
-
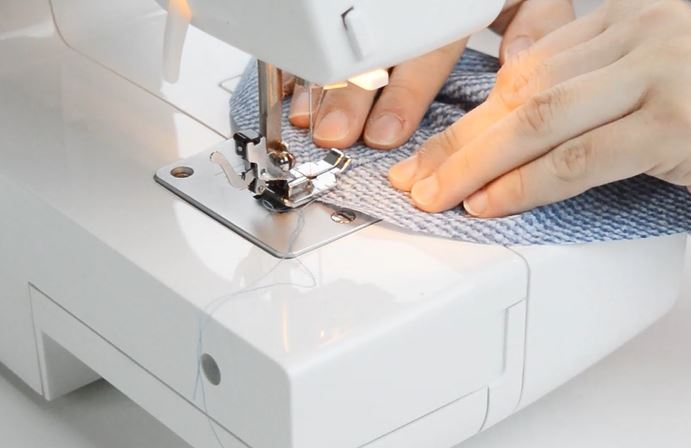
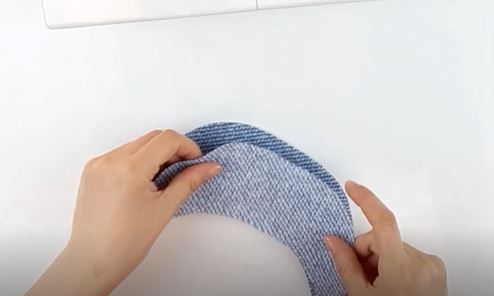
Take a single-arc panel and sew one of its sides to the double-arc panel.
-
Flatten the seam to one side and topstitch it from the right side.
-
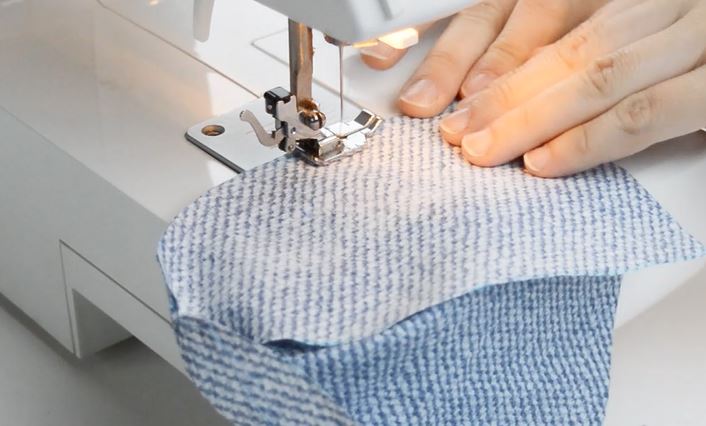
Sew the second single-arc panel to the second double-arc panel on the same side as in step 11.
-
Flatten the seam and topstitch from the right side.
-
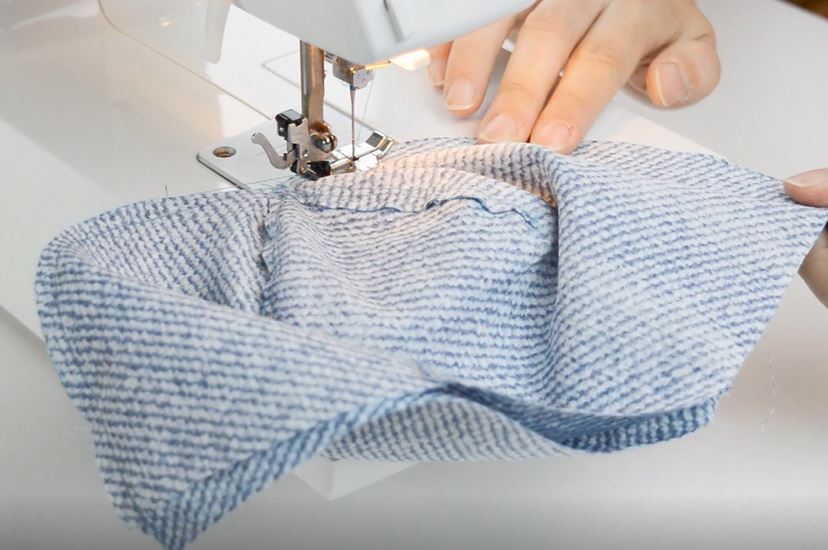
Join both halves of the cap together. Again, flatten the seam to one side and topstitch from the right side.
-
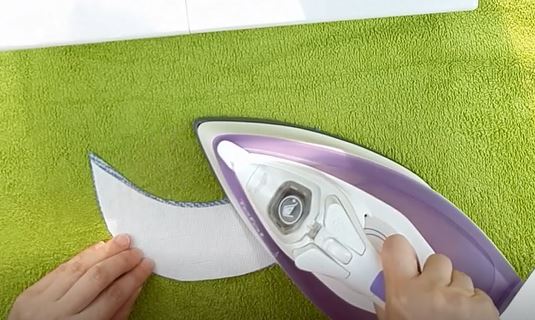
Take the visor interfacing and place it against the fabric visor piece. Trim the interfacing on the side that attaches to the cap so it is 3–4 mm shorter than the fabric.
-
Place the interfacing with the adhesive side on the wrong side of the visor fabric and iron it on.
-
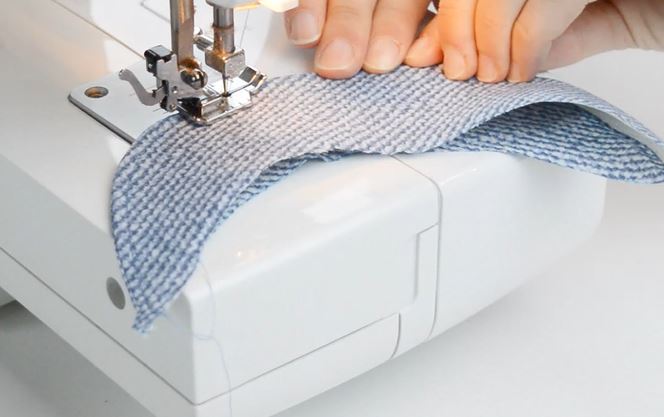
Place the second visor fabric piece on top of the interfaced one, right sides together, and sew along the outer (longer) curve.
-
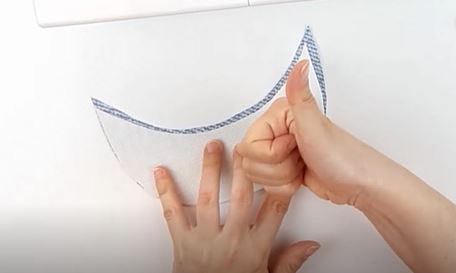
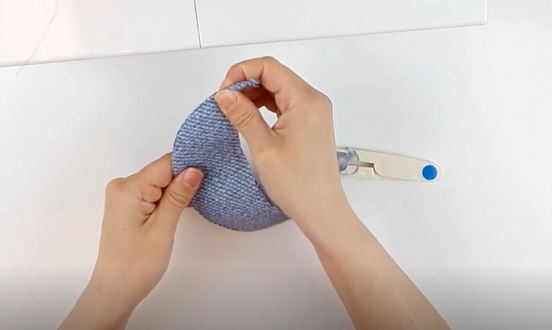
Turn the visor right side out, align the edge properly with your hands, and flatten it.
-
Topstitch the outer curve of the visor approx. 3–4 mm from the edge.
-
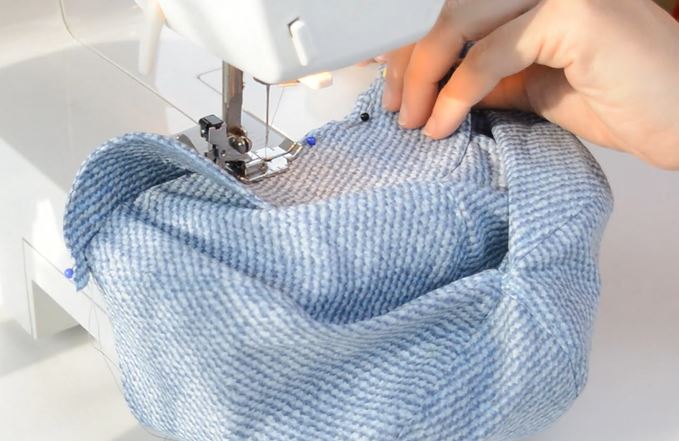
Pin the visor to the bottom of the cap and sew them together.
-
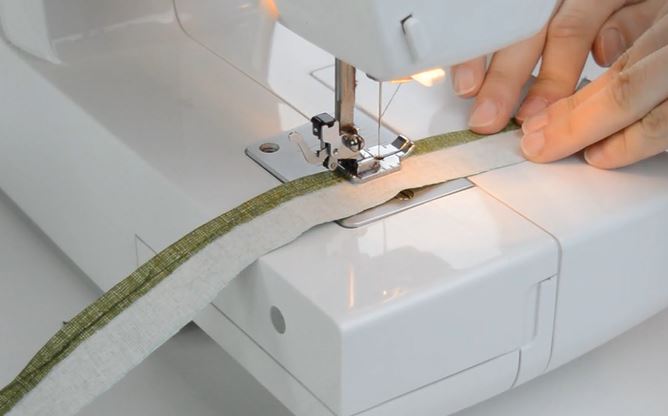
Take the inner sweatband strip, fold one long edge approx. 5–7 mm towards the wrong side, and sew (hem it).
-
Pin the un-sewn edge of the sweatband to the cap and sew around the entire circumference. You can use multiple passes for strength.
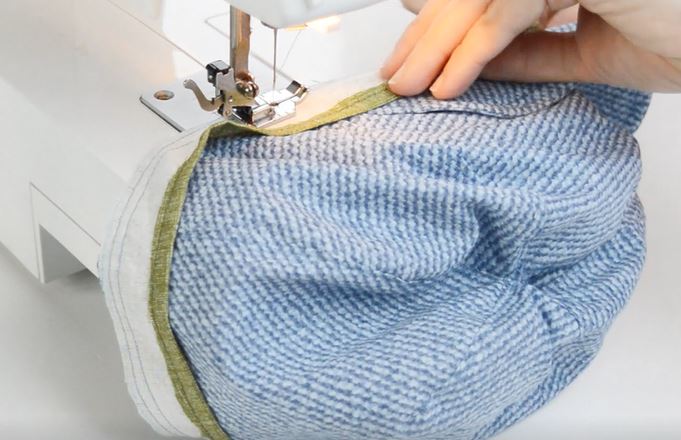
-
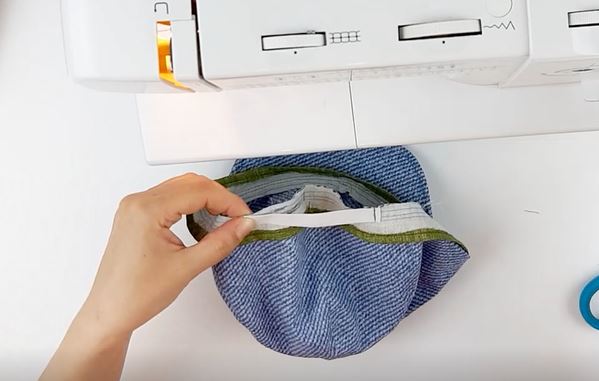
Sew the elastic to the wrong side of the sweatband at the back of the cap so it cinches the cap.
-
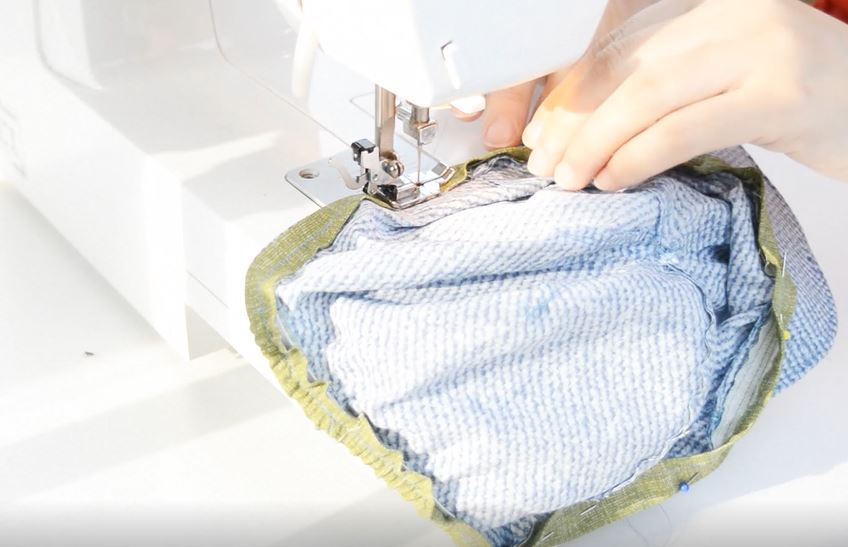
Pin the sweatband to the inside of the cap and sew it down, roughly through the middle of its width.
-
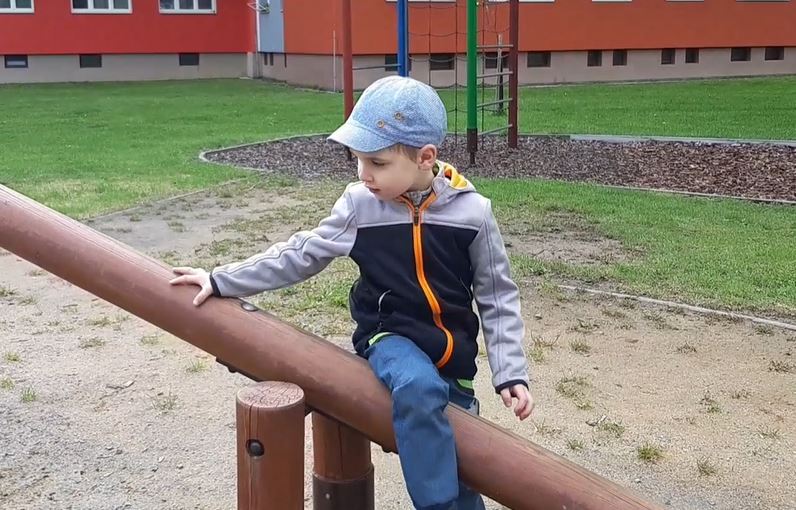
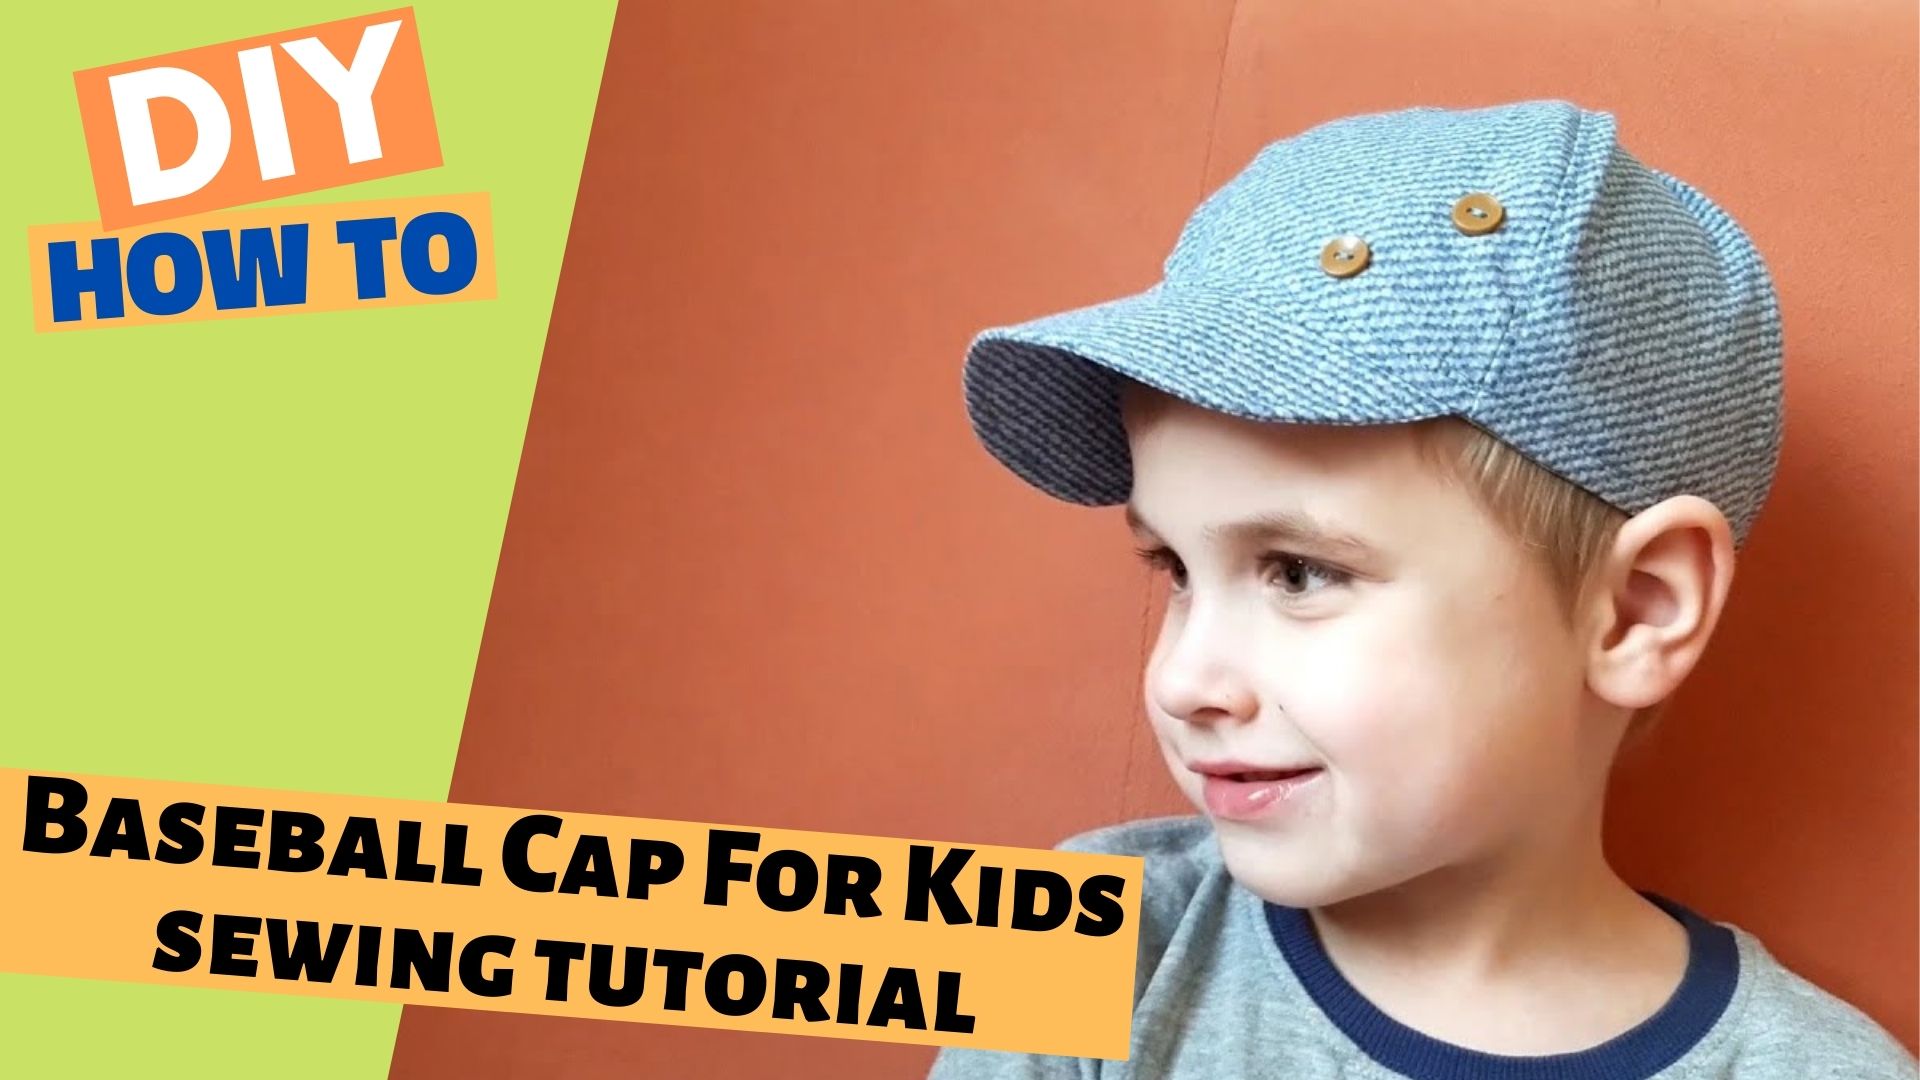
Your baseball cap is finished! You can decorate it with buttons, patches, etc.
The baseball cap is an essential! Learn how to sew a professional kids' baseball cap with this easy-to-follow, beginner-friendly tutorial. This classic style is a staple in every child's wardrobe and remains a must-have accessory for any sunny day.